Modeling the Lorenz Butterfly in Unity
The Lorenz system is a widely studied example of a chaotic system. It’s classically simple, needing only three coupled equations to exhibit a variety of types of traditionally chaotic behavior. First described by Lorenz in 1963, the system was initially designed as a simplified model of convection in the atmosphere.
The system is defined as
\[\dot{x} = \sigma (y-x)\] \[\dot{y} = x (\rho-z)-y\] \[\dot{z} = x y - \beta z\]Where $\sigma$, $\rho$, and $\beta$ are parameters in the system. The classic set of parameters is $\rho=28,\sigma=10,\beta=8/3$.
We are going to build a model in Unity that visualizes trajectories in this system. This will present a few challenges. As a chaotic system, our solution needs to be as precise as possible. That means working in double precision even though Unity defaults to single for many of its built in variables. It also means moving our calculation out of the Update loop, as we want more control over the timestep in our solution and we don’t want to tie it to the frame rate. Finally, it means implementing a higher order solution than the leapfrog solutions we used in the last two posts. In future posts, I’ll give you some specialized classes that can help in modeling this specific type of problem (systems of ordinary differential equations), as well as talk about some methods for improving the efficiency of implementing ODE models (threading to separate the calculation loop from the user interface loop, use of external DLLs to compile code for C performance, called within your C# scripts.)
For now, we are going to implement our solution as a script attached to a game object that will trace out a trajectory. The solution will be stored and calculated in double precision, using a 4th order Runge-Kutta method which we will code into our script. Finally, we will add a trail renderer effect to the object to see a trace of the trajectory in the Unity scene.
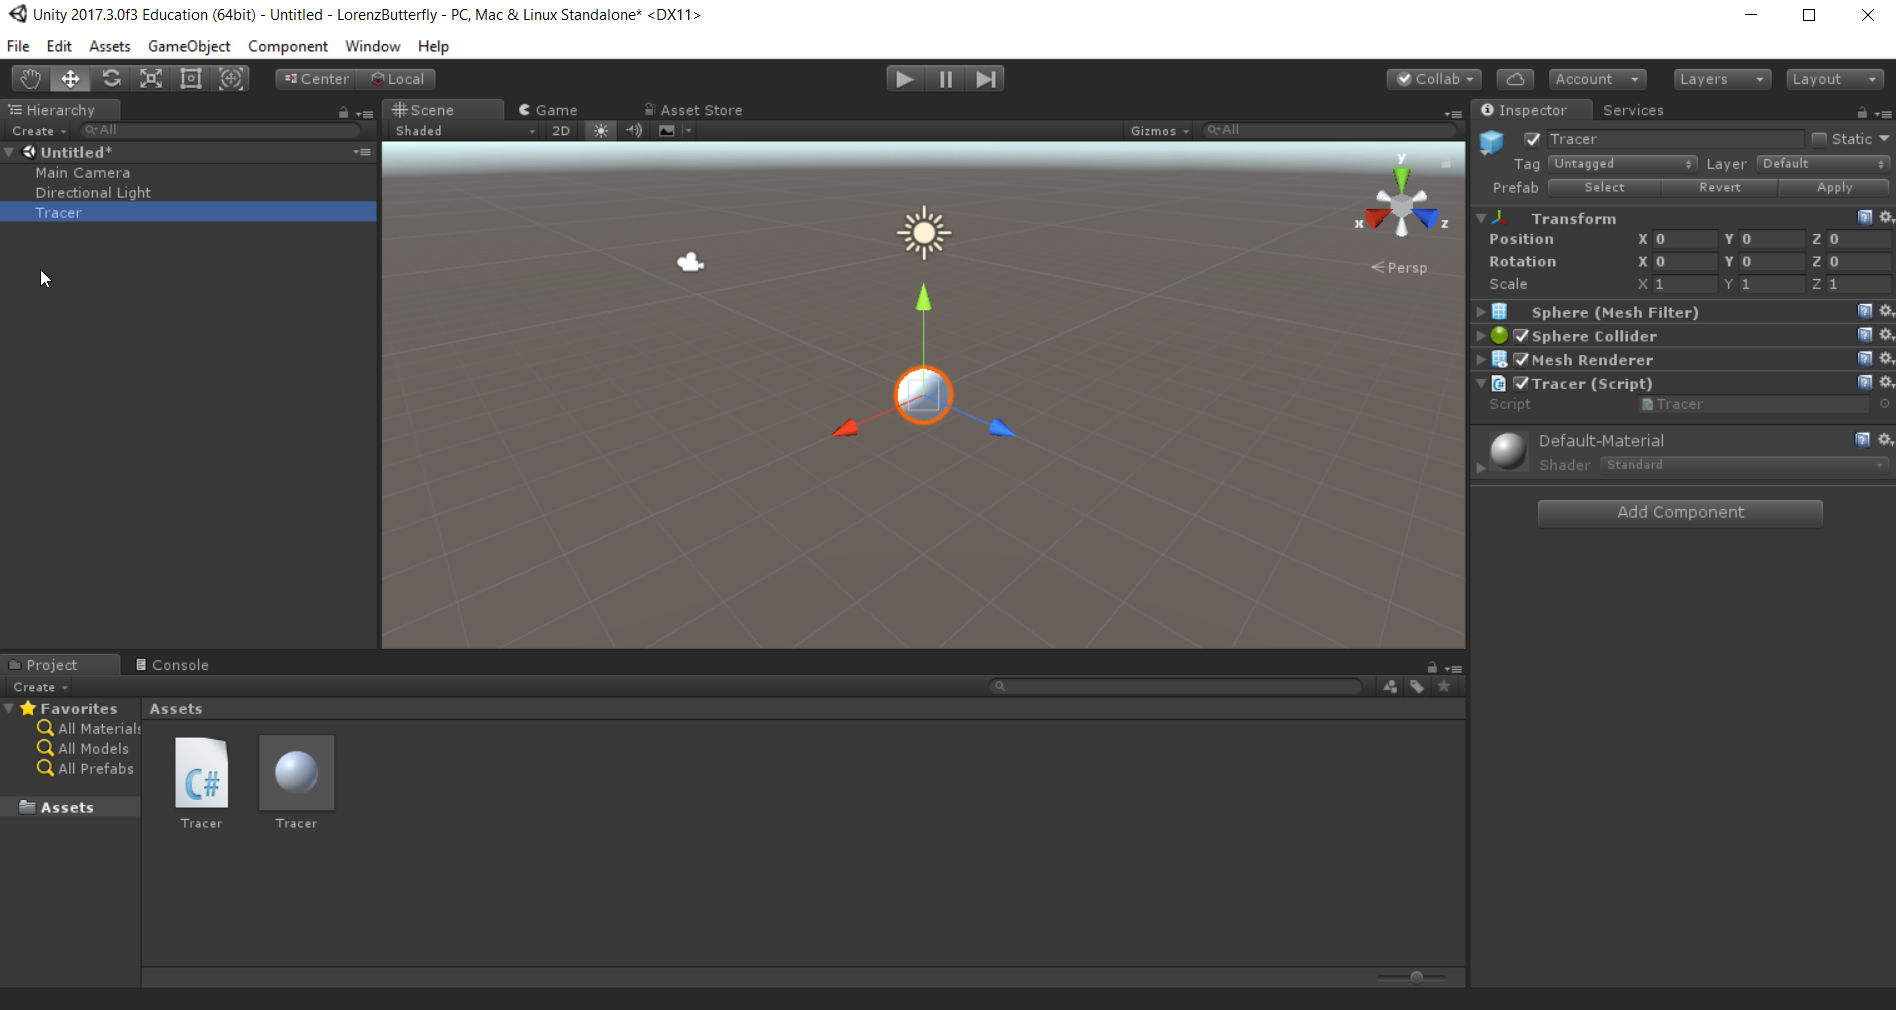
To begin, open Unity and create a new 3D model. As in the last post, we need a base object with a script attached to represent our model. Create a sphere in the hierarchy and rename it “Tracer.” Add a new script called Tracer to it. Drag it into your project panel to make it into a prefab. Save your scene (often).
Open the Tracer script, and add member variables of type double for our model. I’m going to store x,y,and z as a single vector $\vec{x}$ to make the implementation of the RK4 method easier. I’ll also add some extra arrays to store steps in the RK4 calculation, as well as an array to store rates of change of x.
using System.Collections;
using System.Collections.Generic;
using UnityEngine;

public class Tracer : MonoBehaviour {

    double sigma=10.0;
    double rho=28.0;
    double beta=8.0/3.0;
    int n=3;
    double [] x;
    double [] xprime;
    double [] xstore;
    double [] k1;
    double [] k2;
    double [] k3;
    double [] k4;

    // Use this for initialization
    void Start () {

    }

    // Update is called once per frame
    void Update () {

    }
}
The arrays need to be allocated before use, which we can do in the Start routine. There are 4 key MonoBehaviour routines: Awake, Start, FixedUpdate, and Update. Awake is called at instantiation. Start is called before the first call to Update. FixedUpdate is called at least once per frame and is attempted to be called more often at a fixed rate determined in the program. Update is called once per frame.
The typical place we will put initialization for our class is in Start, though you may find in some models where many objects interact with each other, that other objects try to access a classes data before it is initialized. In that case, you may want to use Awake instead of Start.
Add allocation of the arrays to the Start routine, each of which will be n=3 long.
using System.Collections;
using System.Collections.Generic;
using UnityEngine;

public class Tracer : MonoBehaviour {

    double sigma=10.0;
    double rho=28.0;
    double beta=8.0/3.0;
    int n=3;
    double [] x;
    double [] xprime;
    double [] xstore;
    double [] k1;
    double [] k2;
    double [] k3;
    double [] k4;

    // Use this for initialization
    void Start () {
        x = new double[n];
        xprime = new double[n];
        xstore = new double[n];
        k1 = new double[n];
        k2 = new double[n];
        k3 = new double[n];
        k4 = new double[n];
    }

    // Update is called once per frame
    void Update () {

    }
}
We are going to use the FixedUpdate routine to execute each forward step in the calculation, but since the RK4 routine requires multiple calculations of the rates of change per time step, it would be helpful to have a separate method for calculating the rates of change. Lets create a method, RatesOfChange, to do this. This will be done using different values of $\vec{x}$, so have that as input. We’ll use our xprime array to store the output, so we can make this routine void.
using System.Collections;
using System.Collections.Generic;
using UnityEngine;

public class Tracer : MonoBehaviour {

    double sigma=10.0;
    double rho=28.0;
    double beta=8.0/3.0;
    int n=3;
    double [] x;
    double [] xprime;
    double [] xstore;
    double [] k1;
    double [] k2;
    double [] k3;
    double [] k4;

    // Use this for initialization
    void Start () {
        x = new double[n];
        xprime = new double[n];
        xstore = new double[n];
        k1 = new double[n];
        k2 = new double[n];
        k3 = new double[n];
        k4 = new double[n];
    }

    void RatesOfChange(double [] xin) {
        double x = xin [0];
        double y = xin [1];
        double z = xin [2];
        xprime [0] = sigma * (y - x);
        xprime [1] = x * (rho - z) - y;
        xprime [2] = x * y - beta * z;
    }

    // Update is called once per frame
    void Update () {

    }
}
Notice that this routine doesn’t really need to know the member variable x, so for ease of writing out the derivatives we’ll store each element of $\vec{x}$ passed to the routine in local variables x, y, and z.
The integration method we will use is the 4th order Runge Kutta method, or RK4. This is a classic method described in many places, Wikipedia has a pretty good write-up. In short, given some function $\vec{f}(x,t)$ that gives the rates of change of some system of variables $\vec{x}$, you can predict the next step using the algorithm as follows.
\[\vec{x}(t+h) = x(t) + (1/6) (\vec{k}_1 + 2 \vec{k}_2 + 2 \vec{k}_3 + \vec{k}_4)\]where
\[\vec{k}_1 = \vec{f}(\vec{x}(t),t)\] \[\vec{k}_2 = \vec{f}(\vec{x}(t)+\vec{k}_1/2,t+h/2)\] \[\vec{k}_3 = \vec{f}(\vec{x}(t)+\vec{k}_2/2,t+h/2)\] \[\vec{k}_4 = \vec{f}(\vec{x}(t)+\vec{k}_3,t+h)\]We’ll implement the RK4 step in FixedUpdate. For this step, we’ll call rates of change using the current value of $\vec{x}$, and use xprime to set $\vec{k}_1$. The next value of the rates of change in our RK4 step is at $\vec{x}+1/2 \vec{k}_1$, so we will calculate that and store it in xstore. This will be repeated as necessary to complete the step.
using System.Collections;
using System.Collections.Generic;
using UnityEngine;

public class Tracer : MonoBehaviour {

    double sigma=10.0;
    double rho=28.0;
    double beta=8.0/3.0;
    int n=3;
    double [] x;
    double [] xprime;
    double [] xstore;
    double [] k1;
    double [] k2;
    double [] k3;
    double [] k4;

    // Use this for initialization
    void Start () {
        x = new double[n];
        xprime = new double[n];
        xstore = new double[n];
        k1 = new double[n];
        k2 = new double[n];
        k3 = new double[n];
        k4 = new double[n];
    }

    void RatesOfChange(double [] xin) {
        double x = xin [0];
        double y = xin [1];
        double z = xin [2];
        xprime [0] = sigma * (y - x);
        xprime [1] = x * (rho - z) - y;
        xprime [2] = x * y - beta * z;
    }

    void FixedUpdate() {
        double h = (double) Time.fixedDeltaTime;
        RatesOfChange (x); // start using current position
        for (int i = 0; i < n; i++) {
            k1 [i] = xprime [i] * h;
            xstore [i] = x [i] + 0.5*k1 [i];
        }
        RatesOfChange (xstore);
        for (int i = 0; i < n; i++) {
            k2 [i] = xprime [i] * h;
            xstore [i] = x [i] + 0.5*k2 [i];
        }
        RatesOfChange (xstore);
        for (int i = 0; i < n; i++) {
            k3 [i] = xprime [i] * h;
            xstore [i] = x [i] + k3 [i];
        }
        RatesOfChange (xstore);
        for (int i = 0; i < n; i++) {
            k4 [i] = xprime [i] * h;
            x [i] = x [i] + (1.0 / 6.0) *
                (k1 [i] + 2.0 * k2 [i] +
                2.0 * k3 [i] + k4 [i]);
        }
    }

    // Update is called once per frame
    void Update () {

    }
}
Finally, let’s see if this is working by attaching our calculation back to the visualization. We will do that by updating our Tracer objects position to the calculated value each frame. Since our calculations are done in double precision, and the positions of the objects are done in float, a dynamic cast will be required. Additionally, let’s give initial values for $\vec{x}$ in start, also based on the transform.position. Notice that going from double to float requires a dynamic cast, but going from float to double does not. You only need to recast those numeric assignments that could result in loss of precision.
using System.Collections;
using System.Collections.Generic;
using UnityEngine;

public class Tracer : MonoBehaviour {

    double sigma=10.0;
    double rho=28.0;
    double beta=8.0/3.0;
    int n=3;
    double [] x;
    double [] xprime;
    double [] xstore;
    double [] k1;
    double [] k2;
    double [] k3;
    double [] k4;

    // Use this for initialization
    void Start () {
        x = new double[n];
        x [0] = transform.position.x;
        x [1] = transform.position.y;
        x [2] = transform.position.z;
        xprime = new double[n];
        xstore = new double[n];
        k1 = new double[n];
        k2 = new double[n];
        k3 = new double[n];
        k4 = new double[n];
    }

    void RatesOfChange(double [] xin) {
        double x = xin [0];
        double y = xin [1];
        double z = xin [2];
        xprime [0] = sigma * (y - x);
        xprime [1] = x * (rho - z) - y;
        xprime [2] = x * y - beta * z;
    }

    void FixedUpdate() {
        double h = (double) Time.fixedDeltaTime;
        RatesOfChange (x); // start using current position
        for (int i = 0; i < n; i++) {
            k1 [i] = xprime [i] * h;
            xstore [i] = x [i] + 0.5*k1 [i];
        }
        RatesOfChange (xstore);
        for (int i = 0; i < n; i++) {
            k2 [i] = xprime [i] * h;
            xstore [i] = x [i] + 0.5*k2 [i];
        }
        RatesOfChange (xstore);
        for (int i = 0; i < n; i++) {
            k3 [i] = xprime [i] * h;
            xstore [i] = x [i] + k3 [i];
        }
        RatesOfChange (xstore);
        for (int i = 0; i < n; i++) {
            k4 [i] = xprime [i] * h;
            x [i] = x [i] + (1.0 / 6.0) *
                (k1 [i] + 2.0 * k2 [i] +
                2.0 * k3 [i] + k4 [i]);
        }
    }

    // Update is called once per frame
    void Update () {
        transform.position = new Vector3 (
            (float)x[0],(float)x[1],(float)x[2]
        );

    }
}
Play this. If your tracer starts at (0,0,0) and stays there, well, that is a stable point of the solution, so even if everything is working it won’t be very interesting or help us to validate the solution. Move your tracer away from the origin a little, press play, and if everything works you should have a tracer orbiting the strange attractor of the Lorenz system.
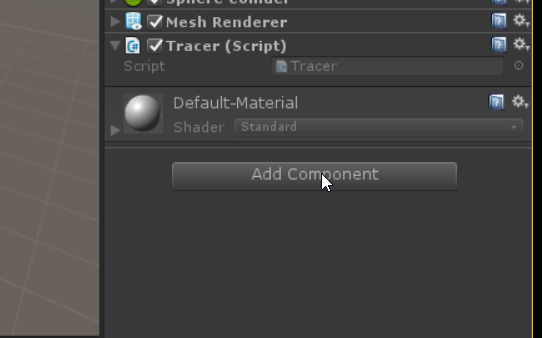
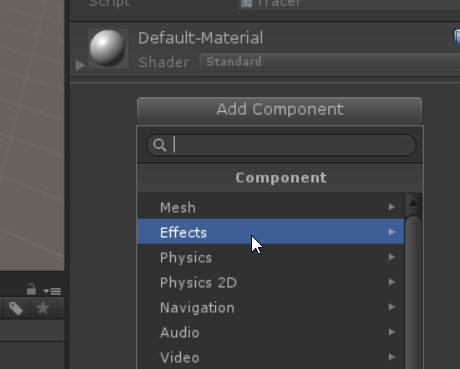
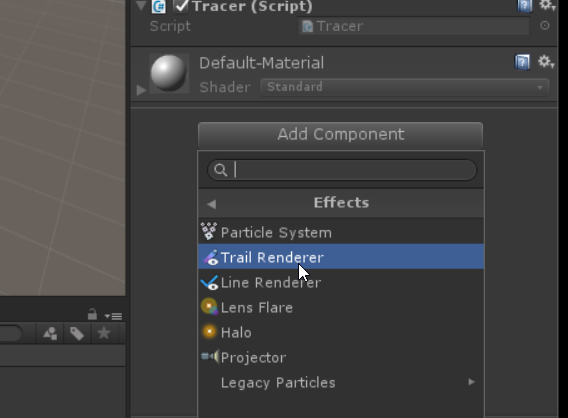
Let’s add some visual effects. Select the prefab for the tracer in the Project panel, and add a TrailRenderer component.
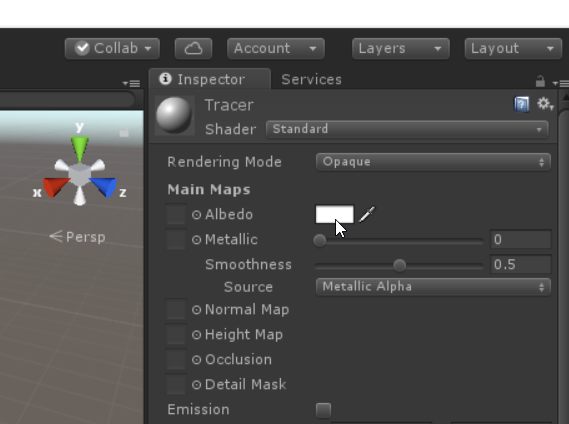
Play your model again. One of a few things might happen if everything is done right depending on which version of Unity you are running and on which architecture, but most likely what you see is a thick pink trace. It’s thick because we are at the default thickness. It’s pink because that’s what Unity shows whenever it doesn’t have an assigned material. TrailRenderer does not get assigned a default material the way that the standard sphere we used for the tracer does. Let’s add a material for our sphere, that will allow us to both set the color of our object and give us something to use as the material for our trace.
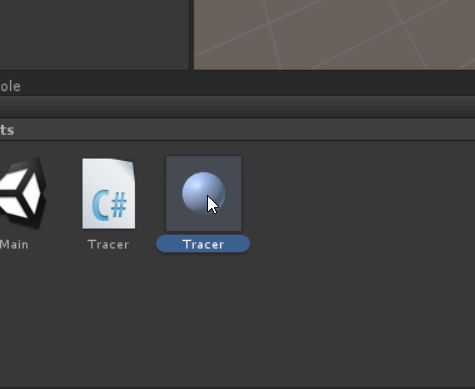
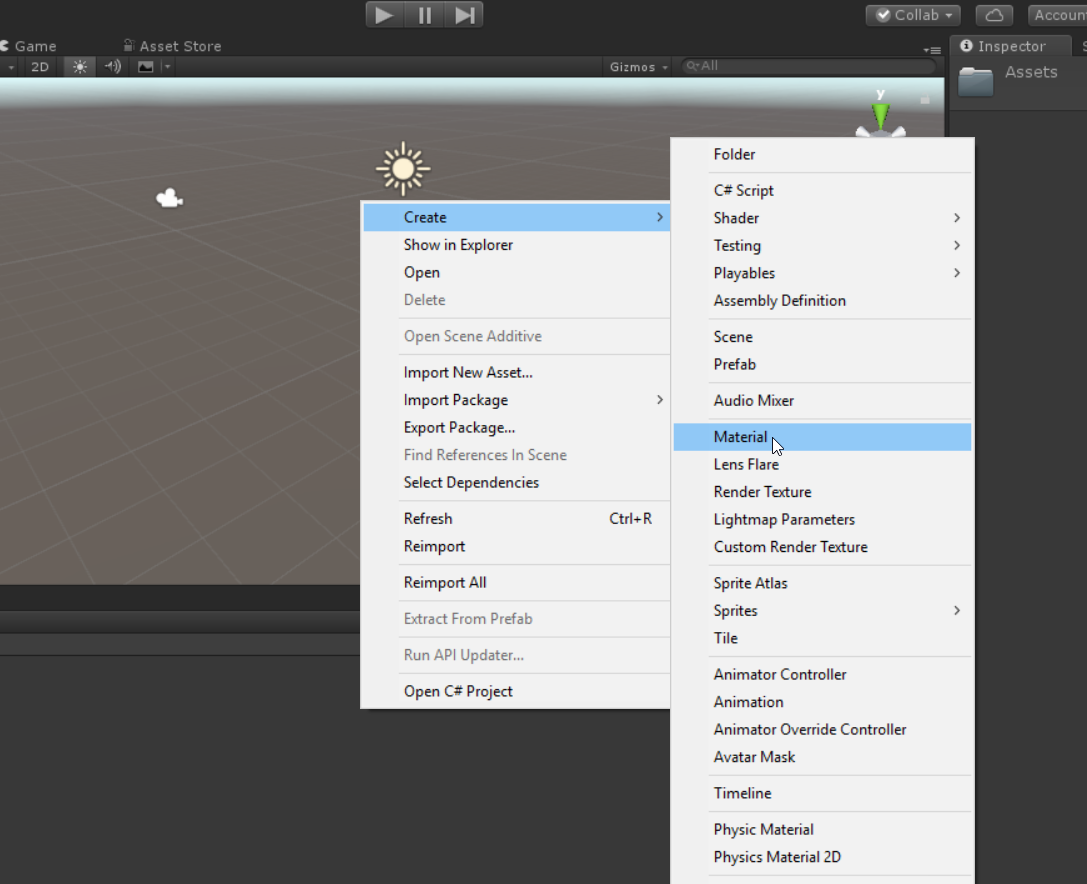
Right clicking in the Project panel, select Create->Material. I’m going to name it Tracer. The icon looks a little like the Tracer prefab, so if you find it easier to name it something else, like TracerMaterial, feel free.
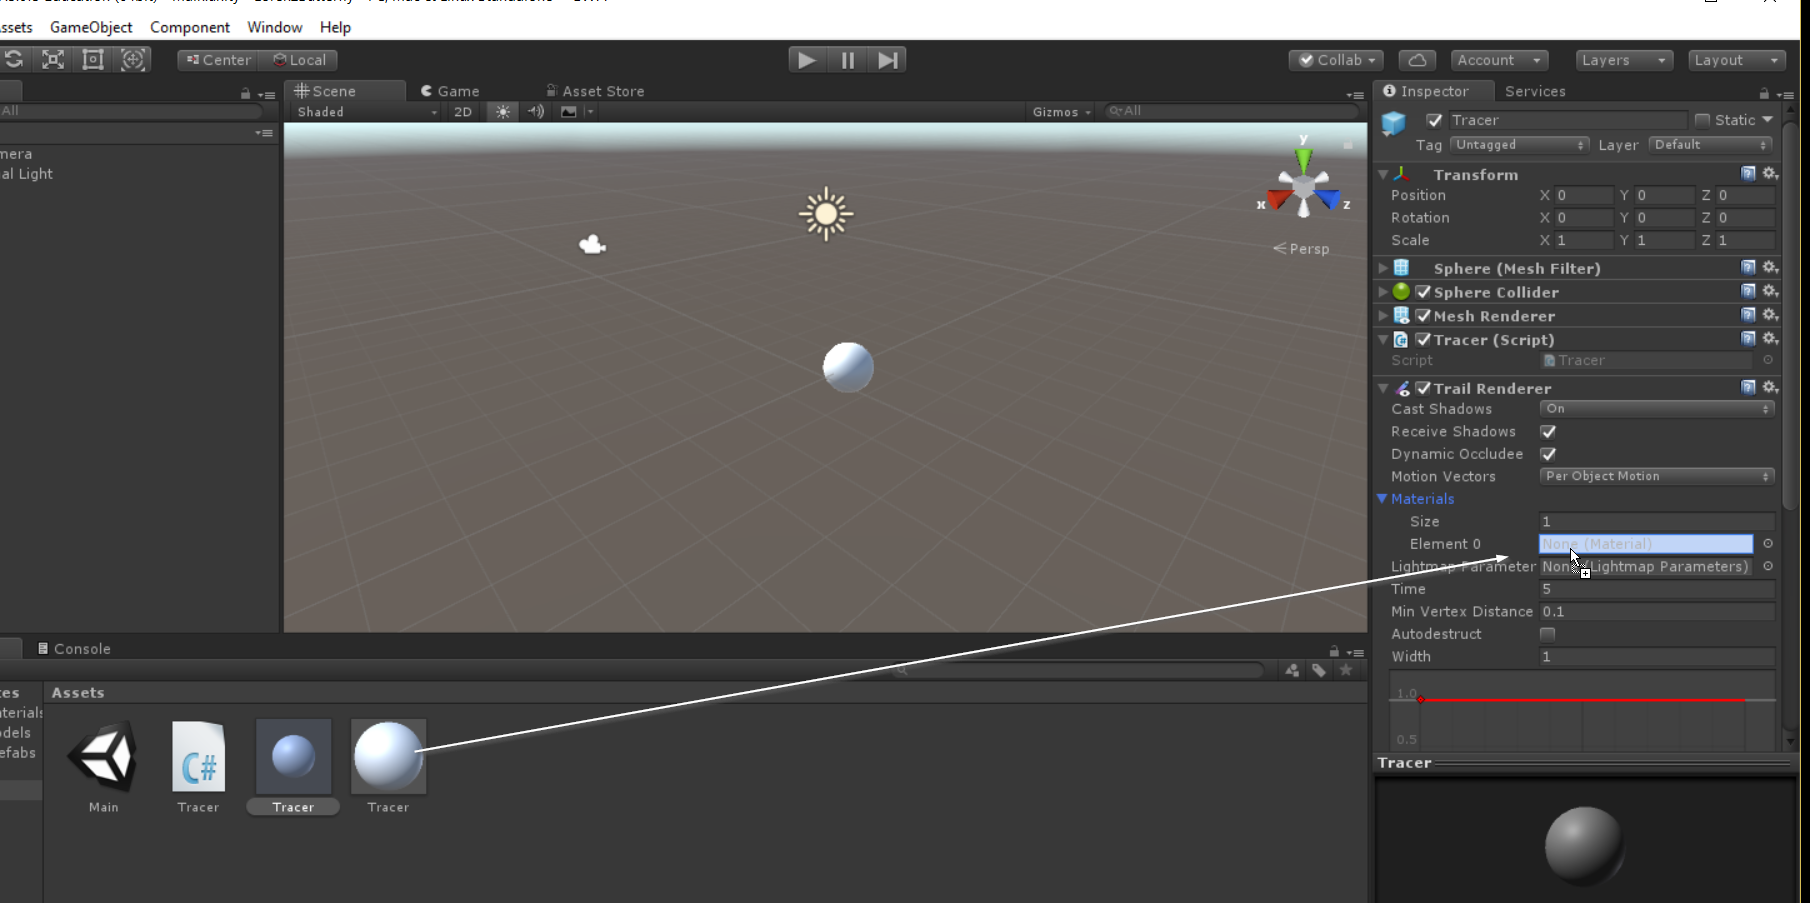
Once you have your own material to work with, select the prefab for tracer in the Project panel, this will highlight the prefab in the Inspector. Click the triangle next to the word Materials in the TrailRenderer component to expand it. Drag your material into the Element 0 field.
If you play the model now, your trace should have the same color as the material you created.
Highlight the material, and change the color of the material. Our original Tracer prefab still is using the default material, so highlight it, expand the MeshRenderer component if it is collapsed, expand the materials in MeshRenderer, and drag your material into element 0. Play again. Your Tracer and its trail should have the same color.
Let’s fix the thickness of the trail. The width property of the TrailRenderer component sets how thick it is. Set it to something smaller, like 0.1. Now when you run your model, the trail should be thinner. Adjust as needed to get something you can see, but that has the detail you would like.
Notice that as it runs for a while, the old trail starts to disappear. You can change the time property of TrailRenderer to change how much history is kept. It is defaulted to 5 seconds, set it to something longer to keep a longer trace.
If we have multiple traces, we might want to see them in different colors. Let’s modify our Tracer script to allow you to set a color as a public member variable, which can override the material color. Then, in Start set the Renderer and TrailRenderer’s colors to this value.
using System.Collections;
using System.Collections.Generic;
using UnityEngine;

public class Tracer : MonoBehaviour {

    double sigma=10.0;
    double rho=28.0;
    double beta=8.0/3.0;
    int n=3;
    double [] x;
    double [] xprime;
    double [] xstore;
    double [] k1;
    double [] k2;
    double [] k3;
    double [] k4;
    public Color color = Color.blue;

    // Use this for initialization
    void Start () {
        x = new double[n];
        x [0] = transform.position.x;
        x [1] = transform.position.y;
        x [2] = transform.position.z;
        xprime = new double[n];
        xstore = new double[n];
        k1 = new double[n];
        k2 = new double[n];
        k3 = new double[n];
        k4 = new double[n];
        GetComponent<Renderer> ().material.color = color;
        GetComponent<TrailRenderer> ().material.color = color;
    }

    void RatesOfChange(double [] xin) {
        double x = xin [0];
        double y = xin [1];
        double z = xin [2];
        xprime [0] = sigma * (y - x);
        xprime [1] = x * (rho - z) - y;
        xprime [2] = x * y - beta * z;
    }

    void FixedUpdate() {
        double h = (double) Time.fixedDeltaTime;
        RatesOfChange (x); // start using current position
        for (int i = 0; i < n; i++) {
            k1 [i] = xprime [i] * h;
            xstore [i] = x [i] + 0.5*k1 [i];
        }
        RatesOfChange (xstore);
        for (int i = 0; i < n; i++) {
            k2 [i] = xprime [i] * h;
            xstore [i] = x [i] + 0.5*k2 [i];
        }
        RatesOfChange (xstore);
        for (int i = 0; i < n; i++) {
            k3 [i] = xprime [i] * h;
            xstore [i] = x [i] + k3 [i];
        }
        RatesOfChange (xstore);
        for (int i = 0; i < n; i++) {
            k4 [i] = xprime [i] * h;
            x [i] = x [i] + (1.0 / 6.0) *
                (k1 [i] + 2.0 * k2 [i] +
                2.0 * k3 [i] + k4 [i]);
        }
    }

    // Update is called once per frame
    void Update () {
        transform.position = new Vector3 (
            (float)x[0],(float)x[1],(float)x[2]
        );

    }
}
Playing the model now, the Tracer will have the color set in the script. Highlight the tracer object in the hierarchy, change the object in the scene’s color to something else and verify this affects the version you play. Some of these scripted changes may not take effect until the model is playing.
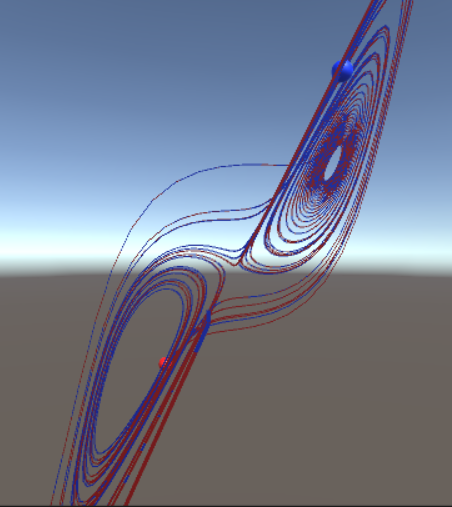
Now that we have a Tracer object, with a trail, that solves the Lorenz system, that we can color as needed, let’s place two of them with very similar, but not exactly similar, initial conditions. Make them different colors. Play the model, and watch as they initially follow a similar path but eventually diverge to very different trajectories, albeit along the same strange attractor. This is the hallmark of chaotic systems, sensitive dependence on initial conditions, such that the exact behavior is very unpredictable over time due to lack of exact knowledge of the initial conditions—but with certain characteristics that are similar among all solutions, such as the butterfly shape of the trajectory.
You may find you want to change your viewpoint as you watch this. We’ll cover camera rigs in a later post, but for now you can use the pause button next to the play button to stop the simulation momentarily, and you can view the model in the scene view as well as the game view. In the scene view, you can rotate the scene or navigate using standard WASD (A – left, D – right, S – back, W – forward) controls if the right mouse button is pressed.
Depending on your settings, you may notice a choppiness to your traces. This can occur if the problem is being calculated so much faster than the frame rate that substantial information is lost between frames. There are a few options you have here. You can call fewer calls to FixedUpdate by changing the FixedUpdate desired time in the Project->Time settings. You could add a counter so that no matter how many timed FixedUpdate gets called per frame, you limit the number of steps that are calculated. You could set your own timestep, and make it smaller, resulting in less total motion per frame. We could replace TrailRenderer with our own custom object, that stores detail about what happens at every step in the calculation, not just what happens per frame as the TrailRenderer does. However, for a very simple trace added to your unity models, TrailRenderer can be a quick and easy way to add a visual history within your models.