Hello Unity
Welcome to the first in a series of blog posts about my experiences using Unity as a modeling and visualization tool. This will cover a “hello world” style program for modeling in Unity, and will introduce the reader to creating a program in the unity interface, adding a game object to the scene, and using a script to control the game object’s position.
This first post is written assuming an audience new to Unity and not experienced at programming.
Today’s post is going to be my “Hello World” for modeling in Unity. Regardless of what modeling tool, language, environment, or interface I am using, the first example I always create is the simple harmonic oscillator. The problem is a classic one in physics education, consider a mass on a spring moved some small amount x from equilibrium. There is a restoring force on the mass that is greater if the distance from equilibrium is greater, and greater if the spring is stiffer (as represented by a spring constant k). The restoring force is written as
\[\vec{F} = - k \vec{x}\]Newton’s second law states that an object accelerates when there is a non-zero net force acting on it, such that $a = \sum F / m$ But acceleration is just the rate of change of velocity, which gives us the model
\[\frac{dv}{dt} = -(k/m) x\] \[\frac{dx}{dt} = v\]For a first model, this could be approximated using Euler’s method
New = Old + Change
Change = Rate of Change times Timestep
or more rigorously (granted, the phrases rigorously and Euler’s method should never be used together, but that’s a different post)
\[y(t+h)=y(t)+f(y,t)h\]where $d/dt$ $y(t)=f(y,t)$
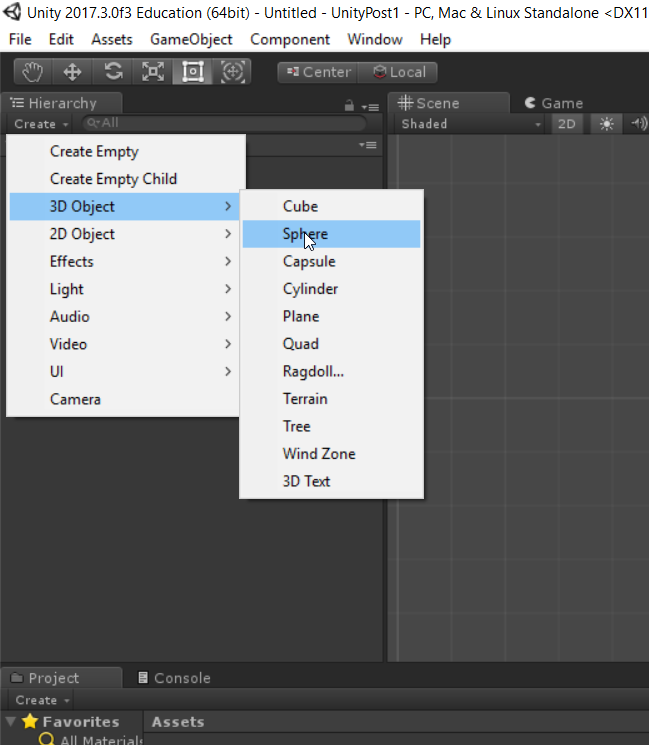
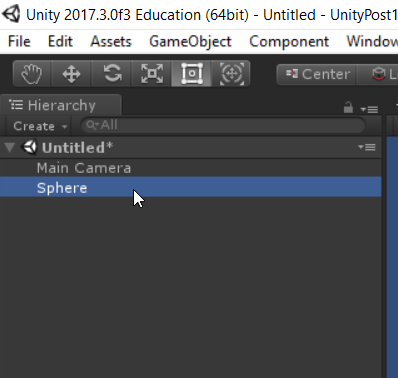
The expected behavior is that a simple harmonic oscillator should move back and forth, and that it should move faster for a lighter mass or a stiffer spring. To implement this model in Unity, first open a new model. This can be done either as a 3D or a 2D model, it won’t change the scripts we write or how we interact with the editor at all for this particular example. We will start by creating a sphere in the scene. You can use the create menu at the top of the hierarchy panel, you can right click in the hierarchy panel, or you can use the GameObject menu in the editor to do this.
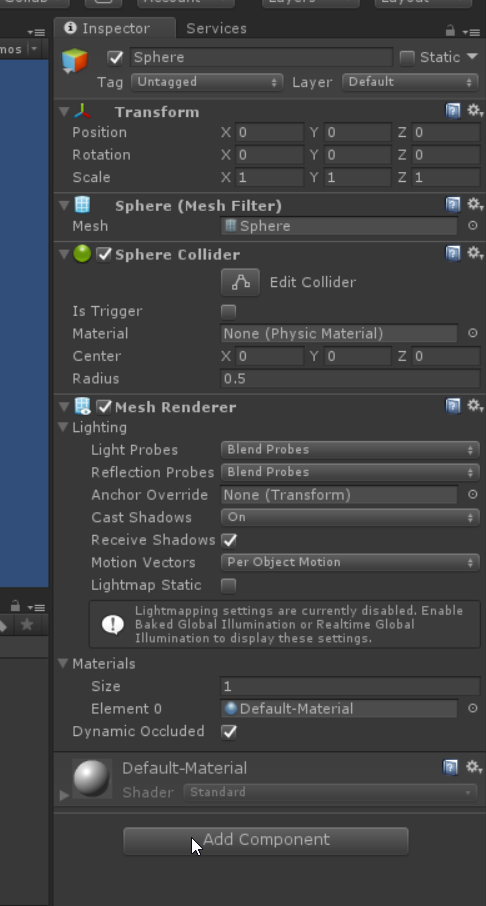
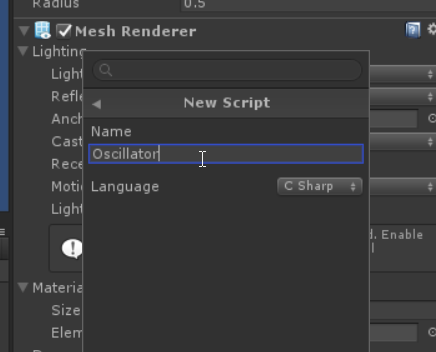
At some point before you get too far along, go to the file menu and save your scene. Any name is OK. I name my main scenes Main. Save every so often if you make changes to the scene. To change the way the object operates in the scene, we want to add a script to the object. In the inspector panel, add a new script component and give it a meaningful name. (I’m going to use the name Oscillator, but you can call yours anything you want.)

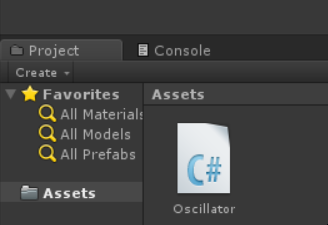
Once you create your script, you will see it in the assets window in the Project panel.
Double click on the script to open and edit it.
Notice that the top of the script includes a bunch of statements at the top of the file that start with the word “using”. These statements import existing code libraries that are needed for a standard Unity script. Following the using statements is a class definition in the form “public ClassName : MonoBehaviour {“. This states that the class we’ve created (in my case ClassName is replaced with Oscillator, it might be different if you named your script something different, but should match the scripts filename) builds off of a base class called MonoBehaviour. MonoBehaviour is the standard class for all Unity game objects, and includes a lot of default behavior, including the ability to provide your own “Start” and “Update” methods. An empty version of these methods are provided, and after their definitions are complete, there is a final closing “}” to end the class definition.
For those of you not used to programming in a C/C++/C#/Java/JavaScript style language, the “{}” characters define a code block. A code block is a command or set of commands that is treated as a single piece of code. Every method we create will be followed by a code block. Every loop and condition will be followed by a code block. For first time programmers, expect to spend a lot of time making sure your “{“ and “}” characters match up correctly.
Notice that before each of the method definitions for Start and Update there are some comments. Comments begin with a “//” sequence, and are just notes to the programmer, they don’t affect the code at all.
Start and Update are key methods in a MonoBehaviour script. Start is guaranteed to be called once before the object is drawn on the screen the first time during play, and Update will be called exactly once per frame draw.
We will create member variables to store our calculation, and this will be done in double precision. (the difference between double and single precision will be another blog post, but for now just know that double precision (double) numbers have twice the precision of single precision (float) numbers. As a computational scientist you want to use doubles when doing math that should be right, but in game development most variables are stored as floats because rendering floats on most GPUs is fast(er) compared to doubles. The double/float duality should be on your mind a lot when working in Unity.
When creating variables, we can create them inside of a method, and they will be defined just inside the method, or we can create them outside of the methods but inside of the class, and they will be available to the entire class. Class variables are also called “member variables”.
using System.Collections;
using System.Collections.Generic;
using UnityEngine;

public class Oscillator : MonoBehaviour {

	double v;
	double x;

	// Use this for initialization
	void Start () {

	}

	// Update is called once per frame
	void Update () {

	}
}
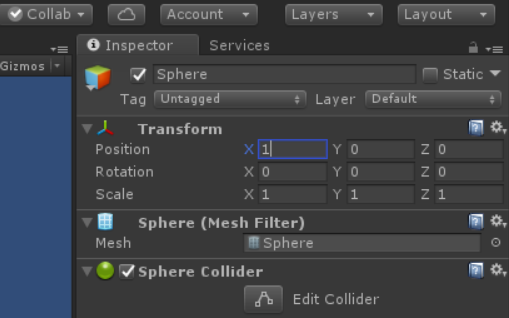
Let’s use the Start routine to set “x” based on the position of the object in the scene. Going back to the Unity editor, select the sphere object in the hierarchy panel and notice what is displayed in the top of the inspector for this object. The first component for the object is the “Transform”. A game objects transform provides information about its location, rotation, and scale within the scene. Change the x value of the objects position. You can type it in manually, or move the object in the x direction in the scene panel.
In the script, add lines in Start to access the object’s transform’s position’s x coordinate.
using System.Collections;
using System.Collections.Generic;
using UnityEngine;

public class Oscillator : MonoBehaviour {

	double v;
	double x;

	// Use this for initialization
	void Start () {
		x = transform.position.x;
		v = 0.0;
	}

	// Update is called once per frame
	void Update () {

	}
}
Note that we don’t need to define transform as a member variable as it is already defined as part of MonoBehaviour. Also note the use of the “.” period character here. The period is to object oriented programming as ‘s is to the English language–it indicates possession. If transform has a member variable position, we access it as “transform.position”. If in turn position has a member variable “x” we can get that as “transform.position.x”.
Here I am using a member variable of type double for the position x in calculation as transform.position.x is a float, not a double. We also set the initial velocity to zero.
Our model we want to solve also needs a spring constant and a mass, let’s make them both 1 to start, and store them as member variables.
using System.Collections;
using System.Collections.Generic;
using UnityEngine;

public class Oscillator : MonoBehaviour {

	double v;
	double x;
	double m = 1;
	double k = 1;

	// Use this for initialization
	void Start () {
		x = transform.position.x;
		v = 0.0;
	}

	// Update is called once per frame
	void Update () {
	}
}
Finally, let’s apply our Euler method rule (OK, technically we are going to apply a Leapfrog rule – bonus points for those of you who can see why what we do here isn’t a proper Euler’s method solution, more bonus points for those of you who can say why that’s a good thing.)
using System.Collections;
using System.Collections.Generic;
using UnityEngine;

public class Oscillator : MonoBehaviour {

	double v;
	double x;
	double m = 1;
	double k = 1;

	// Use this for initialization
	void Start () {
		x = transform.position.x;
		v = 0.0;
	}

	// Update is called once per frame
	void Update () {
		double h = Time.deltaTime;
		v = v - k / m * x * h;
		x = x + v * h;
	}
}
Note I’m using a timestep here that’s just the time since the last frame, which you can get as Time.deltaTime. This can be good or bad. The good is that it ties to the frame rate and the physics ideally should display in real time. The bad is that if the frame rate is low the calculation is then done with a large timestep, and you don’t have real control over your timestep.
Finally, let’s tie this back to the visual. We need to set the transform’s position, but due to how it is stored internally (transform components are immutable objects) we can’t just change the x component of the transform, we have to set a whole new position, which is stored in an internal object of type “Vector3”, and we’ll have to make a new one.
using System.Collections;
using System.Collections.Generic;
using UnityEngine;

public class Oscillator : MonoBehaviour {

	double v;
	double x;
	double m = 1;
	double k = 1;

	// Use this for initialization
	void Start () {
		x = transform.position.x;
		v = 0.0;
	}

	// Update is called once per frame
	void Update () {
		double h = Time.deltaTime;
		v = v - k / m * x * h;
		x = x + v * h;
		transform.position = new Vector3 ((float)x,
			transform.position.y, transform.position.z);
	}
}
Since “x” is a double and Vector3 in Unity is comprised of floats, there’s the chance for loss of precision. The compiler will complain if we try to put a double into a float if we don’t give direction that it is intended, which we do with a dynamic cast. This can be done by putting the data type we intend in parentheses in front of the variable name. (double/float duality!)
For new programmers, notice that in C# we can split a command across lines of code, it’s the semicolon that ends the command not the new line. For long lines this can make more readable code, just be careful not to split quoted strings of text across lines.
Save this and go back to the editor and press the play button.
If everything worked, your object should be moving back and forth! Try changing k and m and seeing if it affects the motion of your object in the way you expect.
Click here for the final Unity project
If you didn’t get here from there, be sure to check out updated posts from me and others at the SIGHPC Education Blog