DLLs and Unity
So, I was looking at a task I’ve done before in Unity today but that is always a little tricky – creating C/C++ code as a DLL that then gets imported into Unity.
Why might you want to do this? First, while C# is a reasonably nice language as far as performance speed goes, it could be a lot better. It’s just the way of things. (All other things being equal and in most circumstances…) A compiled language will beat an interpreted language. An optimized compiled language will beat a non-optimized compiled language. Sometimes to get the fastest routine available you have to resort to optimized compiled code, which means Fortran or C/C++. Also, if you’ve ever had the pleasure of multi-language code in which one of the languages is Fortran, you know that mixing Fortran with other languages is a challenge to send the greatest of Makefile gurus running for the hills. So, C/C++ it is.
Additionally, you may find there are numerical libraries written for optimized compiled languages you want to use. Sometimes these languages come pre-built with good C# bindings. Sometimes they don’t. Sometimes they do, but the bindings get in the way of what you really want to do, and you feel the need to write your own. (Caveat to the paragraph above, sometimes these libraries actually are written in Fortran, and the few Makefile gurus who didn’t run to the hills have already done the hard work of developing and creating a great ready to use DLL for us.)
C# has some very nice features for DLL importing, and compared to many other multi-language projects, running C/C++ DLLs in C# code is fairly straightforward. This blog will involve building a Unity scene (a fairly empty one!) that calls a custom external DLL that in turn calls a standard community DLL (in our example FFTW). This blog will focus on doing this in a Windows environment. (Sorry Mac and Linux people. I’ve done this with Unity on those platforms before, and this mostly transfers well, but I’m leaving it up to you to figure out how this will work with XCode, gcc, .dylib files, .so files and such. Your results may vary.)
First things first, let’s build a simple DLL in Visual Studio.
(see for example https://docs.microsoft.com/en-us/cpp/build/walkthrough-creating-and-using-a-dynamic-link-library-cpp?view=vs-2017 for a reference)
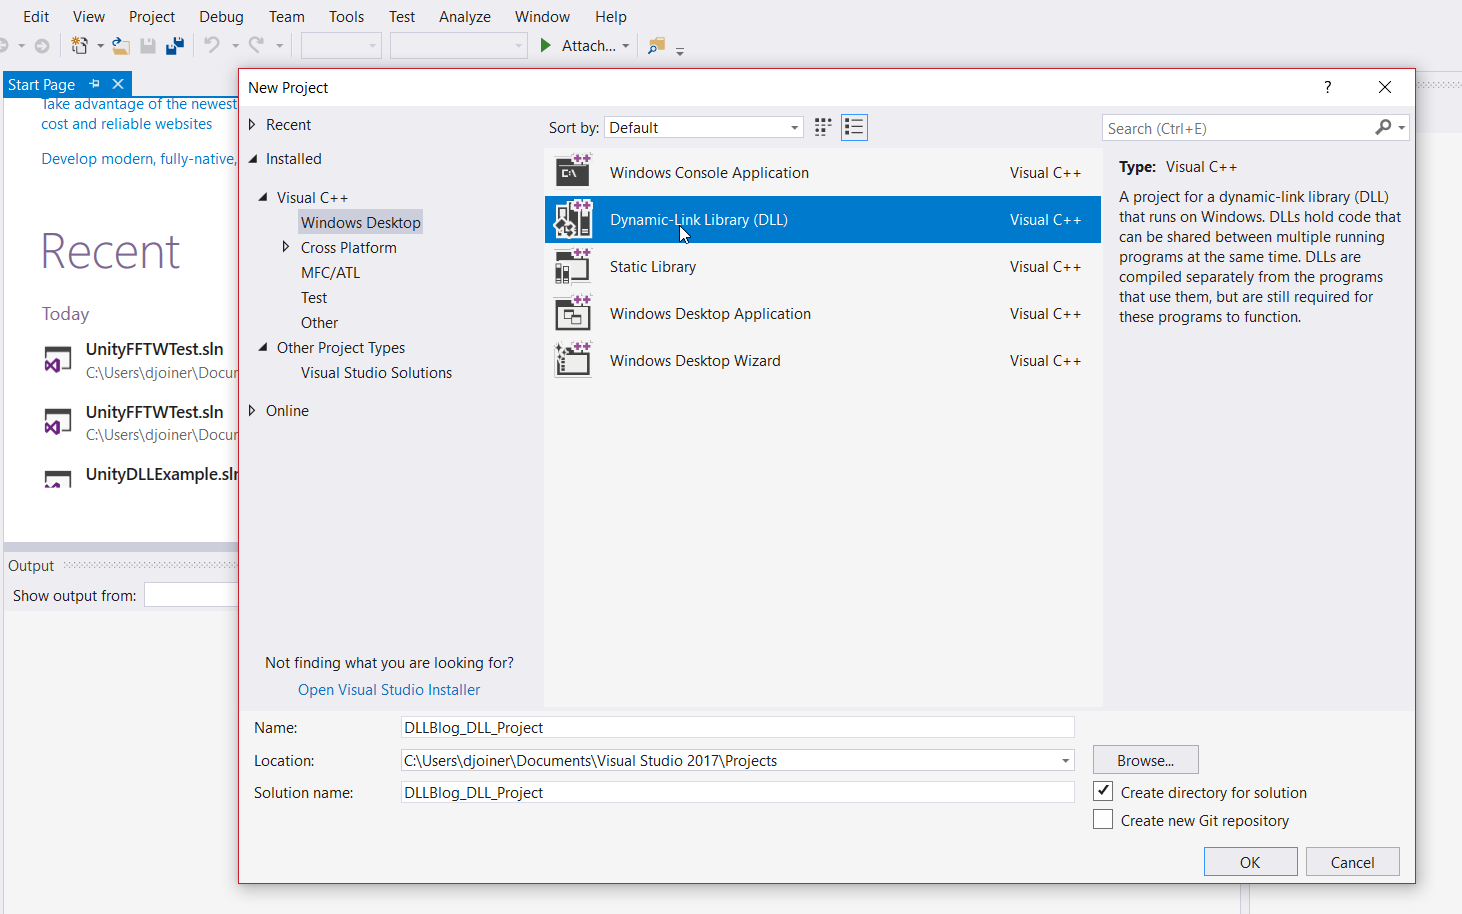
I’m assuming you are doing this in Windows, and have Visual Studio installed with C/C++ support. (https://docs.microsoft.com/en-us/cpp/build/vscpp-step-0-installation?view=vs-2017 ) Open Visual Studio, and create a new project. Give it a name and path you can easily find and remember, and before pressing OK, be sure to select that you are going to create a DLL and not an application. You may need to explore your project template options, I found it in Visual Studio 17 under VisualC++/Windows Desktop/Dynamic-Link Library.
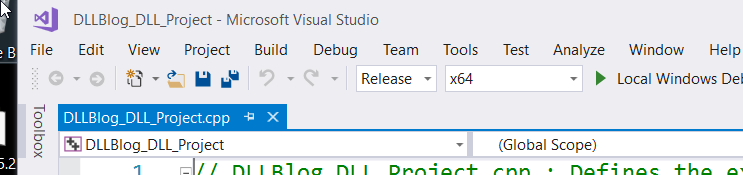
This will create a simple DLL project. Double check your architecture and build type–if you are using 64 bit Unity, make a 64-bit DLL.
To test that we can build and import a simple DLL in Unity, let’s first create a function “testing” that will take a double, and return its value modified in some way.
(C++ code, custom DLL, Visual Studio)
#include "stdafx.h"

extern "C" __declspec(dllexport) double testing(double x) {
	return x + 1.0;
}
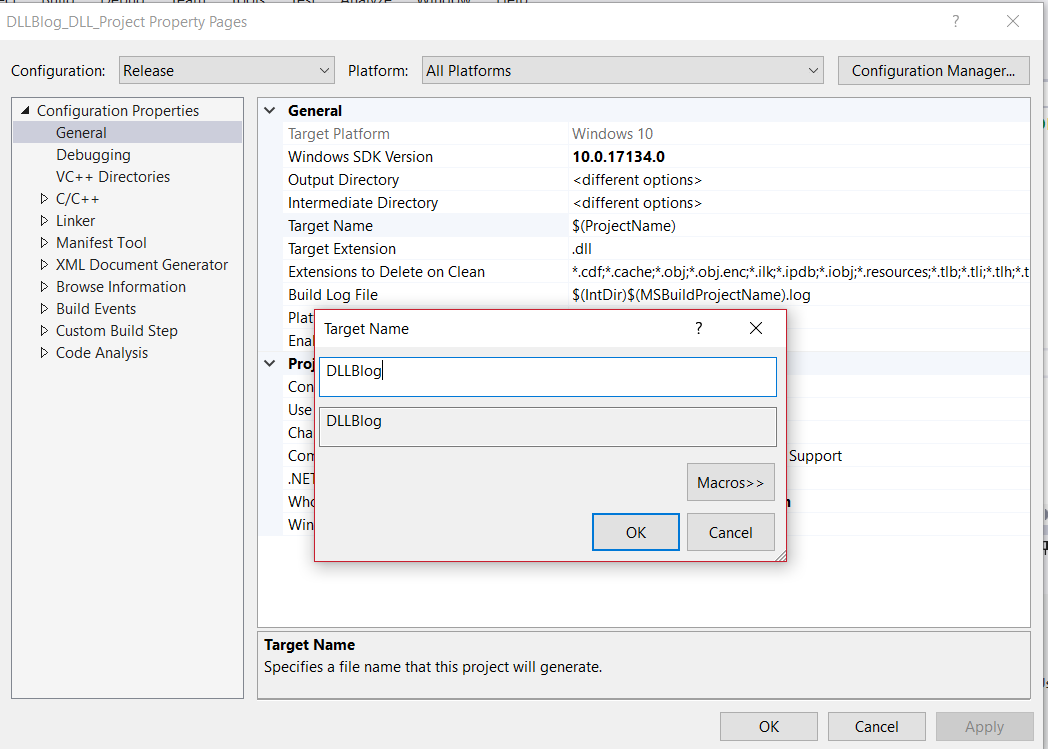
Make sure your target name is something obvious, this can be forced by changing the target name in the project settings (the default is your project name, so if you chose well, so much the better.) Right click on the project in the solution explorer to open the properties, and reset the target name. I’m setting mine to “DLLBlog”.
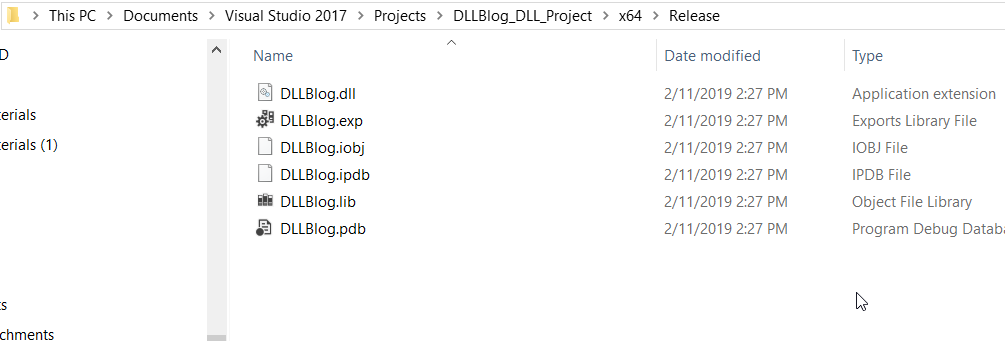
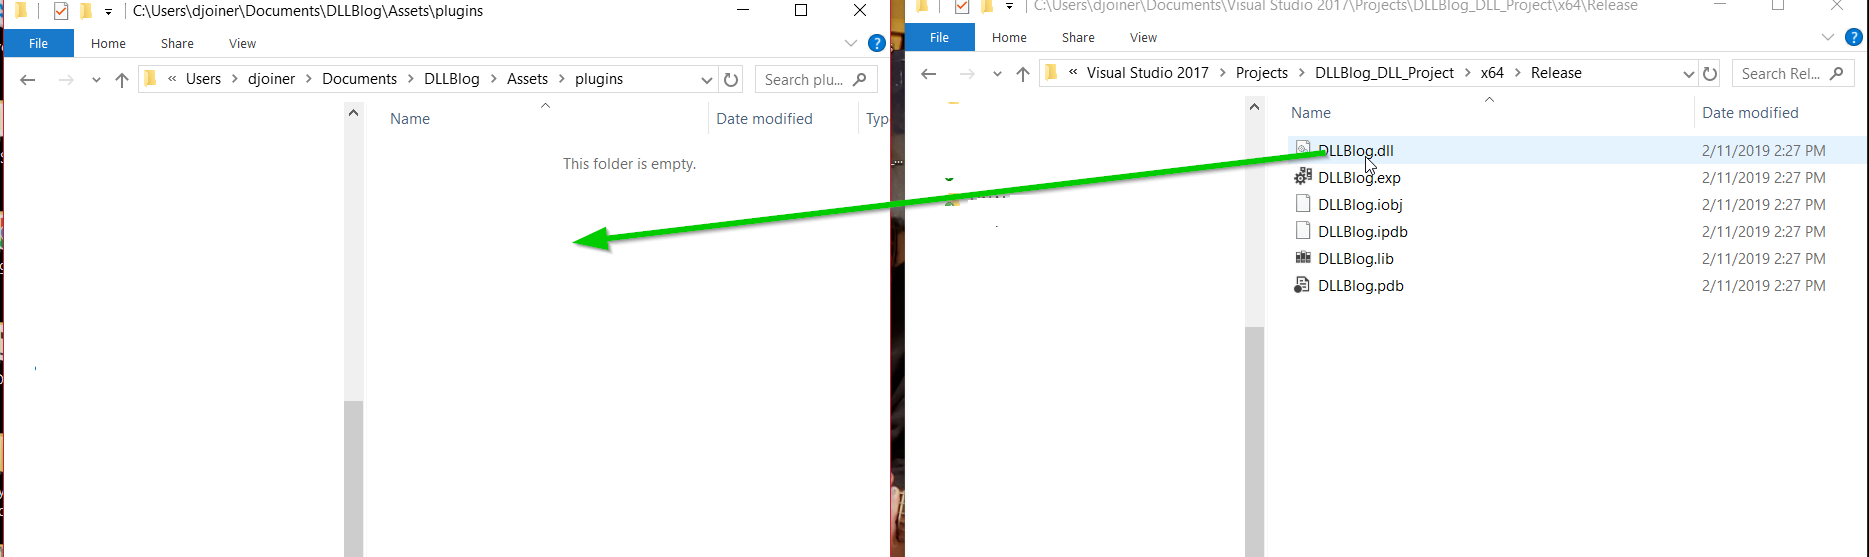
Build your DLL. Open your file explorer window and navigate to where the DLL is built. This can be tricky. For me, my project is in C:/USers/(username)/Documents/Visual Studio 2017/Projects/DLLBlog_DLL_Project/x64/Release. (I said to choose your project name well. I chose poorly.) If you right click on the tab for an open code file, you will get an option to open in the file explorer. From your code file, navigate up the folder tree to the root project folder, and then select x64->Release. (your results may vary. You can also try searching for your DLL from the project root as well.) Remember this location.
Now create a new project in Unity where we will import this DLL. Create an empty object in the scene (I’m naming my empty object “Model”) and attached a new script to it (I’m naming my script “Model”). Save your scene (often). Open your script in whatever editor you typically use with Unity. You will need to include the System.Runtime.InteropServices library in your C# code to call DllImport. Use the DllImport statement to define a extern method. The easiest thing is to have the method named the same as in the DLL, though you can also specify an entry point in the DllImport call.
using System.Collections;
using System.Collections.Generic;
using UnityEngine;
using System.Runtime.InteropServices;

public class Model : MonoBehaviour {

	[DllImport ("DLLBlog")] // note the name should match what your DLL is called
	private static extern double testing (double x); // note the method name should match the one in the DLL
	                                                 // if it doesn't consider using "EntryPoint"

	// Use this for initialization
	void Start () {
		Debug.Log (testing (1.0));

	}

	// Update is called once per frame
	void Update () {

	}
}
Make an empty folder at the root of Assets called “plugins” and copy your DLL file into this location. NOTE due to the way Unity editor loads DLLs I have found that this only works consistently if there is not already a copy of the DLL in the folder. As a result, I typically will shut Unity down completely, and do my file transfers directly between two open file explorer windows, and then re-open Unity to force a refresh. This can make debugging DLLs a bit of a pain.
Transfer your DLL to plugins, open your project in Unity, and run it in the editor. If everything is working, the Debug.Log statement from above should cause the number “2” to print out in the console. If this worked, awesome!
You can repeat this with multiple functions to create DLL calls for your application. (See https://answers.unity.com/questions/1200157/nonstatic-extern-functions-from-dll-plugin-import.html for a description of how to use IntPtr in C# to store C/C++ pointers as memory references to structures allocated in your C/C++ DLL calls).
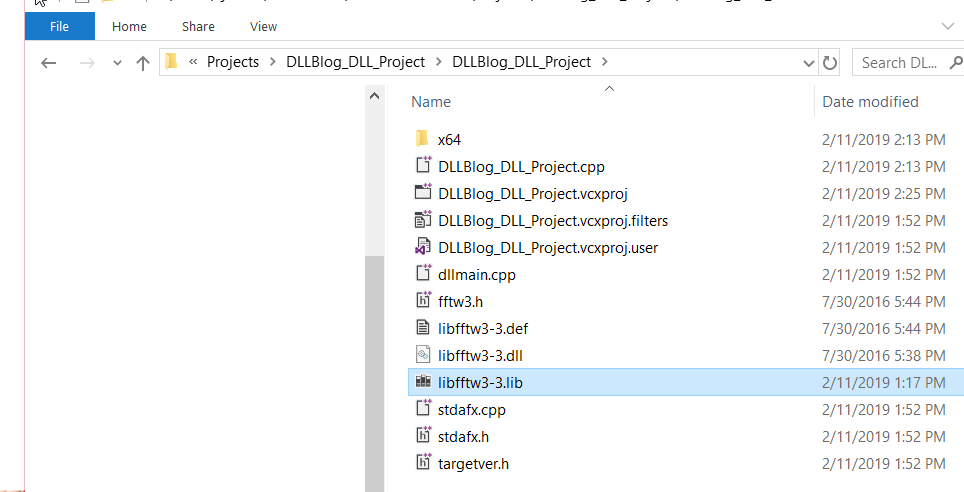
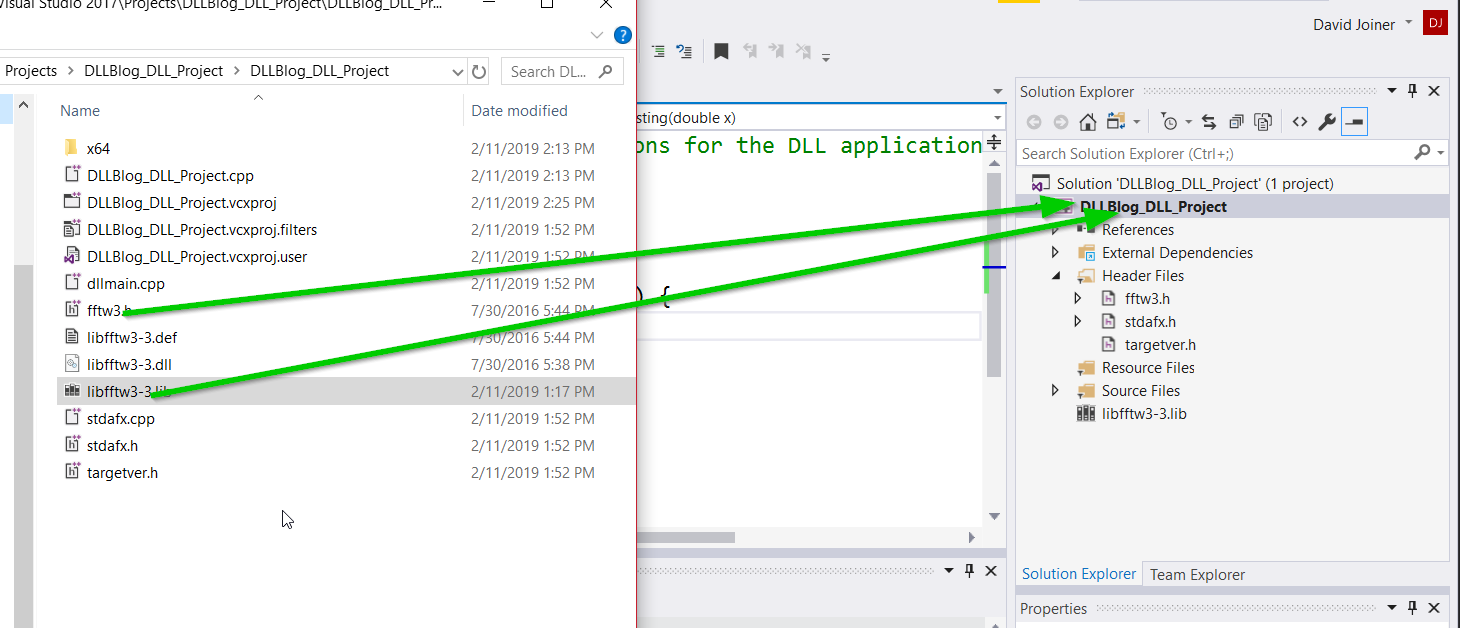
Now, for this application, I wanted to have my external DLL also call its own external DLL, in this case FFTW. I downloaded a pre-built version of libfftw3-3.dll and libfftw3-3.def from http://www.fftw.org/. The version I was able to get online didn’t come with a .lib file, so I used the lib function from Visual Studio to build a lib file from the def file. (See https://stackoverflow.com/questions/2727293/fftw-in-visual-studio and https://stackoverflow.com/questions/5343932/lib-exe-visual-studio-generating-lib-files-from-dlls-and-def-files ) I copied libfftw3-3.dll, libfftw3-3.def, and libfftw3-3.lib into the same folder as my dll’s .cpp and .h files, so that I could be sure they were visible in Visual Studio’s path for my DLL project. I then dragged the .lib and .h files into my project in the solution explorer in Visual Studio.
The next step is to modify the DLL code to call the fftw library, in a way that we can be sure data is moving from Unity, to the DLL, to our additional DLL.
(The code below is slightly modified from http://www.fftw.org/fftw3_doc/Complex-One_002dDimensional-DFTs.html#Complex-One_002dDimensional-DFTs )
// DLLBlog_DLL_Project.cpp : Defines the exported functions for the DLL application.
//

#include "stdafx.h"

#include "stdafx.h"
#include "fftw3.h"


double example()
{
	fftw_complex *in, *out;
	fftw_plan p;
	int N = 1024;
	double retval = 0.0;

	in = (fftw_complex*)fftw_malloc(sizeof(fftw_complex) * N);
	out = (fftw_complex*)fftw_malloc(sizeof(fftw_complex) * N);
	p = fftw_plan_dft_1d(N, in, out, FFTW_FORWARD, FFTW_ESTIMATE);
	for (int i = 0; i < N; i++) {
		in[i][0] = 1.0;
		in[i][1] = 0.0;
	}
	fftw_execute(p); /* repeat as needed */

	retval = out[0][0];
	fftw_destroy_plan(p);
	fftw_free(in); fftw_free(out);
	return retval;
}

extern "C" __declspec(dllexport)  double testing(double x) {
	double y = example();
	return x + y;

}
Make the changes to the C/C++ DLL code, build it, close Unity if you have not done so already, copy the new DLL file into the Assets/plugins floder in your Unity project using the file explorer. (We’re almost there!) Now, the only additional thing we will need is a copy of ‘libfftw3-3.dll’ in the plugins folder of our Unity project, so that when our custom DLL calls a fftw method, the library is there. Go ahead and copy libfftw3-3.dll into Assets/plugins with our custom DLL. Restart Unity, and run the code.
If everything works, instead of adding 1 to the number we pass from Unity, our code should add the real component of the zeroth element of the fft of the (very constant and boring) test data created in “example”. (I get 1025). A value has moved from Unity, to a custom DLL, to a second standard library DLL, and has been returned to Unity in the form of a new value.
Rinse, Lather, Repeat, and have fun with your Unity projects.
Click here for the final Unity project
** License note: These two zip files do include a copy of libfftw3-3.dll ( http://www.fftw.org/ ) for educational purpose only, to show how DLLs which link to fftw can be included in a Unity application, however please note that FFTW is a GPL-licensed library (not L-GPL) and any derivative works of that particular library would be subject to copyleft ( https://en.wikipedia.org/wiki/GNU_General_Public_License ). The license restrictions that affect community codes can vary greatly, so caveat emptor with regards to using them in a project that you will redistribute, particularly redistribution for commercial purpose. Read the licences carefully.